How To Set Up Your First Pedalboard

Building a pedalboard is an exciting, productive and rewarding experience for guitar players of all levels. Whether you’ve been playing for just a few months or even several years, putting together a set of stompboxes can unlock tonnes of creativity, giving you a palette of different tones!

Elliot Stent

Elliot Stent

Making sure that you have everything you need to set up a solid, functional and low-noise pedalboard is important before you start wiring things together. That’s why we’ve created this insightful guide, giving you a step-by-step set of instructions, loads of tips and all the requirements.

How To Build A Pedalboard: Step-By-Step

Later in the article, we go into far more detail about the points below. However, if you want to cut to the chase then follow these concise steps to form your pedalboard!

  1. Choose a versatile set of pedals – Tuner, overdrive, distortion, wah, delay and reverb pedals are great effects to begin with.
  2. Find the right-sized board – Make sure that you find a pedalboard that has enough space to accommodate the effects that you have.
  3. Purchase a pedal power supply – Keep your pedals powered quietly with a high-quality isolated pedal PSU. It’ll make a difference, trust us!
  4. Order and connect your pedals – Route and position your pedals in a logical way, to ensure that you’re getting the most out of them.
  5. Mount your stompboxes to your pedalboard – After you’ve established your layout, apply velcro to your pedalboard/stompboxes and mount them. Job done!

When Should I Start Buying Guitar Pedals?

Welcome to the world of stompboxes and pedalboards! We assume that you’ve reached a point where you feel limited by the tones offered by your amp, and that you’re keen to expand your sonic horizons.

It is when you come to that realisation that you should start investing in guitar pedals. Coming in all shapes and sizes, the amount of pedal options is vast. From the wave of overdrives out there to more niche effects like ring modulators, the sheer level of choice might seem slightly overwhelming at first.

However, setting up your first pedalboard should not be a daunting prospect! In this next section, we’ve identified essential pedals that you should choose before putting together your very own board.

Which Guitar Pedals Should I Start With?

While unique and experimental effects can be cool (especially if you’re a hipster), to most players they may seem a little bit far-fetched. That’s why we’ve picked out some super-popular pedalboard staples; the usual suspects if you will. You’ll see the following pedals gracing the boards of anyone from pub giggers all the way to seasoned pros.

But before we look at all of the key stompboxes you should have, you may already be thinking ‘which guitar pedal should be my first?’. Well, that’s an easy one – a tuner pedal!

Tuner Pedal

It may sound boring, but a tuner pedal is undoubtedly the most important thing to have on your pedalboard. No matter how great the rest of your pedals are, if you’re not in tune then you’ll still sound like crap!

The BOSS TU-3 is the industry standard, not only accurate but practically indestructible too. However, TC Electronic’s line of PolyTune pedals are also solid and precise, and their PolyTune 3 units come in ultra-compact mini enclosures too. These particular tuners can also identify which strings are out of tune when you simply strum all of them at once. Pretty cool, eh?

Tuner Pedals for your Pedalboard

Featured Tuner Pedals

Shop Tuner Pedals

Distortion Pedal

If you’ve already got an amp with a built-in distortion channel, then getting a dedicated pedal may not be necessary. However, if your amp only has a single channel or can’t churn out loads of gain, a distortion stompbox will raise some hell!

Usually coming with volume and gain controls, most distortion pedals will also feature a tone knob that gives you more treble and bite. You’ll find that many modern distortion pedals will also boast several EQ controls, much like the ones you’ll find on your amp. These offer more flexibility, letting you craft some tailored tones.

Distortion Pedals for your Pedalboard

Featured Distortion Pedals

Shop Distortion Pedals

Overdrive Pedal

There’s a thin line between distortion and overdrive when it comes to how they sound. Simply put, a distortion pedal will dish out lots of dirt while an overdrive delivers a low-gain crunch. Much like their distortion brethren, the amount of overdrive pedals out there will blow your mind. However, there are some renowned models that have led the way for years, even decades.

Ibanez’s range of vibrant green Tube Screamer pedals are always worth a shout, renowned for providing focused mid-range tones. The BOSS BD-2 Blues Driver is also highly-regarded, offering a smooth and creamy overdrive. However, if you’re looking for something more affordable, Tone City and Mooer make mini overdrive pedals that are great value-for-money.

Featured Overdrive Pedals

Shop Overdrive Pedals

Wah Pedal

When it comes to describing how a wah pedal sounds, its name is the biggest hint. Accenting your guitar tone in the way that we pronounce an ‘a’ vowel, a wah pedal’s vocal-like quality makes it one of the most expressive effects around.

Operated via a rocking plate that is controlled with your foot, a wah pedal delivers an animated crying sound. This becomes even more apparent when used with distortion or overdrive. Heel down, you’ll achieve a rounded and nasally tone that’ll turn into a piercing and articulate scream when you press down.

Jim Dunlop’s Cry Baby wah pedal range is arguably the most popular around. Producing affordable base models all the way up to heavily-modified artist versions, the Cry Baby range is very diverse. Heck, they even make a mini version!

Wah Pedals on a Pedalboard

Featured Wah Pedals

Shop Wah Pedals

Chorus Pedal

A chorus pedal is a part of the modulation family of effects, along with phaser, flanger and tremolo. They are often grouped together because they work similarly, colouring your tone via signal processing. But let’s not get into too much technical detail!

We’d recommend getting a chorus pedal above the others to start with, as they are used more often in rock and contemporary music. Offering a sweet, angelic and shimmering sound, a chorus pedal sounds like it is doubling what you’re playing, almost like a 12-string guitar. If you’ve ever heard Nirvana’s “Come As You Are”, the main riff is drenched in gorgeous chorus. The Boss CE-2 offers a classic 80s sound, while the Tone City Angel Wing is great budget option.

Featured Chorus Pedals

Shop Chorus Pedals

Reverb Pedal

Like a distortion pedal (not in terms of how it sounds!), you won’t really need a reverb pedal if your amp already has the effect built-in. If not, then this type of pedal will give your sound some musical space and richness.

A reverb pedal basically emulates the echo that is created when you produce a sound in a large space, like a hall for example. Reverb is used often in music production, and a reverb pedal will thicken your guitar’s sound by giving it an ambient trail, which is particularly great when used with clean settings on your amp.

The TC Electronic Hall of Fame is an excellent all-rounder, boasting different reverb types like spring, plate and shimmer. However, if you’re looking for something really cheap and simple, the Tone City Tiny Spring is an excellent choice, with a very convincing spring verb sound.

Reverb Pedals on a Pedalboard

Featured Reverb Pedals

Shop Reverb Pedals

Delay Pedal

Also a time-based effect like reverb, a delay pedal reproduces your guitar sound as a repeat. While that description may not make it sound very appealing, as a creative tool, a delay pedal is pretty hard to beat.

For example, The Edge (U2) has relied on delay to create some of the most interesting guitar parts ever heard. Great for enhancing clean passages, a delay is also commonly used in conjunction with distortion and overdrive, particularly for enhancing the sound of solos.

TC Electronic’s delay equivalent of the Hall of Fame is the Flashback, which offers a versatile selection of delay types. The BOSS DD-3T is also super-solid and easy to dial-in, producing crystal-clear and musical repeats.

Delay Pedals on a Pedalboard

Featured Delay Pedals

Shop Delay Pedals

Honourable Mentions

While we’ve suggested all of the key contenders, there are other popular pedals out there that you may wish to add to your pedalboard too. Depending on the styles that you play, some alternative effects pedals could offer more variety and usefulness.

A noise gate pedal is worthy of note, especially is you play hard rock or metal. For example, if you’ve chosen a potent-sounding distortion pedal with tonnes of gain on tap, then a noise gate will tame any of the unwanted noise it could produce. The BOSS NS-2 is a particular favourite, as it lets you isolate noisy pedals with its own loop.

On the subject of high-gain beasts, fuzz pedals are also popular with alternative rock and blues fans. Giving you a broken up and grainy character, fuzz boxes are great fun for experimental players looking to push the sonic boundaries.

Shop All Guitar Pedals

Pedalboard vs. Multi-FX

After explaining all of the above, it might sound crazy to even mention Multi-FX. However, if you’re unaware of what a Multi-FX unit is, then you may realise that it could be a more viable choice for you. Basically, a Multi-FX pedal is an all-encompassing unit that offers up to hundreds of different effect sounds and presets – all in one enclosure!

Taking the hassle out of building a pedalboard, a Multi-FX is far easier to set up and can be cheaper than buying several stompboxes, a pedalboard, cables and a power supply (we’ll get to all of that later). Having said that, Multi-FX units can also be limiting. For example, if there are any effects that don’t cut the mustard within a Multi-FX, you can’t replace them like you can with individual pedals.

Whichever your preference is, there’s no right or wrong. Multi-FX pedals have been around for years and are constantly being improved, with many modern units closely imitating their stompbox counterparts. On the flipside, pedalboards are more popular than ever too. So, we’d suggest taking a hard look at both sides and coming to your own conclusion. We’re confident that you’ll pick wisely!

Shop Multi-FX Pedals

How To Choose The Right Pedalboard Size

Now that you have a versatile collection of stompboxes, you’ll need to find the right pedalboard to accommodate them. With pedalboards, you’ll find that size most definitely matters. Why? Because when it comes to choosing a pedalboard, real-estate should always be the first consideration.

Fortunately, pedalboards are available in a huge array of sizes, which means that you’re practically spoilt for choice. We’re going to highlight some more points that you should think about before settling on the perfect candidate.

Powerful vs. Portable – What’s The Best Pedalboard Size?

Wait, don’t look through our guitar pedalboard section just yet! First, take a look in the mirror and ask yourself ‘what type of guitar player am I?’. Depending on your lifestyle as a musician, the size of your pedalboard should reflect that.

For example, if you’re a home hobbyist that likes to experiment with sounds and record in your own space, a bigger pedalboard is easier to justify. As you won’t be moving it around as much, you can spare your back from the strains of regularly lugging around a heavy and cumbersome board.

A bigger pedalboard is also going to be more future-proof. This is very important, as if you catch the pedal bug and buy a few more, then you’ll have enough space to mount your additional stompboxes on it. That can’t always be easy to predict, but if you purchase a board that is relatively small, then it may eventually need upgrading when you run out of space.

If you’re a session or gigging player responsible for transporting your own gear, a medium-sized or smaller pedalboard will be more appealing. While ensuring that you can fit your effect essentials, a more petite pedalboard will offer better portability. This is even more crucial if you use public transport, where a light and compact rig will be a lifesaver!

We’ve alluded to them already, but over the last few years mini pedals have soared in popularity. There are now many pedalboard brands that have jumped onboard with this surge, manufacturing their own mini pedalboards. These extremely easy-to-carry boards are designed to fit up to 3-4 standard-sized stompboxes, or between 8-10 mini pedals. These are even small enough to have as hand luggage on a plane!

Shop All Pedalboards

Which Brands Make Pedalboards?

Pedaltrain Pedalboards

Pedaltrain are the industry standard when it comes to pedalboards. Relied upon for years, Pedaltrain’s multi-rail designs allow you to easily mount your stompboxes, while letting you also tuck cables underneath for a neater look.

Some of Pedaltrain’s larger pedalboards will also have a raised rear, making the pedals on the back rails slightly easier to reach with your feet. This type of design has another advantage, as it gives you enough space to mount a pedal power supply underneath the board. This means that you can save precious real-estate on the surface, giving you more space for extra pedals!

Coming in all different sizes, from the pocket-sized Pedaltrain Nano to the gargantuan Pedaltrain Terra, the brand has catered for just about every type of player. Also available with either soft or hard pedalboard cases, you can protect your pedal’s fragile features from potential damage.

Pedaltrain Sizes Diagram

Featured Pedaltrain Pedalboards

Shop Pedaltrain

Mono Pedalboards

There isn’t that much variation with pedalboards, as they are mostly just flat metal platforms. However, a Mono pedalboard has a slightly different layout and construction compared to a Pedaltrain.

Made from a thin sheet of anodized aluminium, this tough material is very light and makes Mono pedalboards extremely portable. Featuring several cutouts as opposed to rails, there is more surface area on a Mono pedalboard. This means that there is no compromise when it comes to pedal placement. The only downside with Mono pedalboards is their price!

Shop Mono

T-Rex Pedalboards

T-Rex are a bonafide pedal brand in their own right, but they make pedalboards too. Their ToneTrunk pedalboard range is very affordable, with all models including stylish soft cases that offer adequate protection.

T-Rex has also used a slightly different design concept however, with their boards featuring two tiers. With the front half of the board sitting flat and the back half featuring a raised platform, this design guarantees easy access to your pedals mounted at the back. This eliminates the worry of accidentally switching on your pedals that sit in front, or knocking their controls!

Shop T-Rex

How Do I Power My Guitar Pedals?

How you power your pedals can be the difference between good and bad tone. Yes, really! While there are a few ways that you can supply juice to your stompboxes, such as via a dedicated pedal power supply, a daisy chain or with batteries; to us there’s only one method that we’d recommend.

However, before we got to that, we think it’ll be valuable to break down some of the technical jargon that you might come across. The more that you understand about this, the less chance there’ll be of you accidentally damaging your pedals. Trust us, it’s kinda important!

What Is Pedal Voltage, Current & Polarity?

None of us at Andertons Music Co. are fully-fledged electricians, but we know enough about the basics. With regards to pedals; ‘voltage’, ‘current’ and ‘polarity’ are the only things that you need to worry about. And getting to grips with these terms is much easier than you might think.

Voltage

Voltage refers to the difference in charge between two points. In this instance, the source of power and the pedal. Luckily for you, most standard pedals are rated at 9V DC, with ‘DC’ standing for ‘direct current’. Some pedals may require ‘alternate current’ (AC), but in most cases they will come with their own power supply.

Pedals that require 9V may be the most common, but there are some exceptions. For example, powerful digital pedals like delays or reverbs may need 12V or more, due to their more complex circuitry.

To avoid damaging the internals of your pedals, we’d always suggest checking their technical specs before supplying them with power. If you power a pedal incorrectly, you could fry it!

Current

Electric current is a flow of electrical charge. You will usually see this displayed as ‘100mA’ on your pedal, for example. With analogue stompboxes like overdrives or wahs, the amount of current they require will usually be quite low. But much like with voltage, digital pedals will need a higher amount of current in order to function properly.

If a pedal doesn’t receive enough current then it simply won’t work, or its sound will be hindered. However, supplying a pedal with more current than it needs won’t affect its operation or sound at all. So if you give a pedal 300mA of current when its current draw is only 20mA, that’s totally fine!

Polarity

Electrical polarity (positive or negative) is the term used to describe the direction of current flow in an electrical circuit. All this means is that you will come across pedals that are labelled either as ‘centre positive’ or ‘centre negative’, to reflect their polarity.

Fortunately, the vast majority of modern pedals are centre negative, and most pedal power supplies cater just for them. Pedals that are centre positive are a rarity, and those that you do find will probably be vintage pedals. If you need to supply juice to a centre positive pedal, find a separate dedicated power supply.

How Do I Power My Pedals With A Power Supply?

When we said that there’s only one method we’d recommend when it comes to powering your pedals, this is it. A decent, fully-isolated pedalboard power supply will ensure that your pedals are getting pure and clean electricity. If you want to keep the noise of your guitar signal to a minimum, then this is the most efficient way to prevent any annoying buzzing or hum!

Many brands manufacture their own pedal power supplies, including Voodoo Lab, MXR and T-Rex. Available in different sizes, there are plenty of PSUs out there that’ll fit pedalboards of all dimensions. Including several pedalboard power cables, with a PSU you can individually power your pedals cleanly. But please remember, if you want to know how to get an almost noiseless guitar tone, always go for an isolated power supply!

A highly-regarded example is the all-encompassing Voodoo Lab Mondo, which features 12 full-isolated power outputs. With the ability to switch two of it outputs to 12V, as well as boasting four outputs that supply up to 400mA of current, this pedal power supply is suited for hefty pedalboards with lots of stompboxes.

At the other end of the spectrum, some brands make compact PSUs that’ll even fit underneath the tiny Pedaltrain Nano. The Mission Engineering 529x is probably the best power supply for small pedalboards – despite its miniature footprint, it features 8 isolated outputs, feeding 500mA each, or 1 1A output + 4 100mA outputs if you need the extra current. Another great pick is the Cioks DC5, featuring 5 isolated 9V power outputs. With four of them able to switch to 12V, and one that can change to 18V, even power hungry pedals can be supplied with enough electricity. Two of its outputs can also supply 300mA each, making this is a versatile little PSU!

For medium-sized boards, the Voodoo Lab Pedal Power 2+ or MXR Iso-Brick are considered the best around. With 8 and 10 power outputs respectively, these super-solid PSUs are used by thousands of guitarists all over the world. However, the best affordable pedal power supply is arguably the Tone City Pedal Substation 1. With 10 high-current outputs, this all-encompassing pedal PSU can provide juice for power-hungry digital stompboxes and large pedalboard setups in general.

Affordable Pedal Power Supply

Featured Power Supplies

Shop Pedal Power Supplies

How Do I Daisy Chain My Guitar Pedals?

‘Daisy chaining’ is another method for powering your guitar pedals. Unlike a PSU, with this process you’re using a single power source to supply electricity to all of your pedals, connected by a single ‘daisy chain’. This method is quite popular, as daisy chaining is significantly cheaper than buying a dedicated pedal power supply.

The TrueTone 1 Spot is perhaps the most well-known product out there that lets you daisy chain effects. Featuring an 8-plug cable and a single power adapter that supplies 1700mA of current, you can quite easily power an entire board with this affordable product. Also coming with several adapters, this is a fairly comprehensive package.

However, daisy chains have a few disadvantages. Firstly, you’ll have to ensure that all of your pedals are 9V. If not, you’ll simply not be able to power them all via this method. This’ll mean that 12V or 18V pedals will need seperate power supplies. And while we’re on the subject, check their polarity too!

Another thing you’ll have to remember is the amount of current that is supplied. With a product like the 1 Spot, although 1700mA is enough current for 10+ standard pedals, you’ll still need to make sure that the current draw of all your pedals combined does not exceed the total current supplied by your daisy chain. Otherwise, they won’t work!

With that information above, it’s fairly apparent that a pedal power supply keeps things simpler and easier to manage than a daisy chain. But there’s more! Daisy chaining can also cause a lot of electrical noise. As the outputs are not isolated, all of your pedal’s electronics are essentially connected together in the same ‘ground loop’. This means that if one pedal is creating a lot of noise, then it will affect your other stompboxes too.

Why Do Guitar Pedals Still Use 9V Batteries?

Good question. You may have noticed that some of your pedals feature battery compartments enclosed with a typical 9V. Decades ago, guitarists relied upon batteries to power their stompboxes as they were cheap and easy to replace. There are loads of pedal brands that still allow you to power their units with batteries, including BOSS, MXR and Electro-Harmonix.

Having said that, battery-powered pedals are becoming phased-out. This is a trend that we’ve seen recently with modern pedal brands, which have identified that most players now rely upon pedal power supplies. As batteries will run dry without warning, a power supply is far more reliable and consistent, especially if you gig!

The space that a relatively large 9V battery takes up internally is also worth mentioning. By freeing up that space within a pedal enclosure, this allows companies to make their pedals smaller and more compact. This is why you’ll hardly see any battery-powered mini pedals out there!

So with that evidence, why do some pedal brands still fit their units with them? One reason could be if you just want to use a couple of pedals to experiment with when recording, without featuring them on your main day-to-day pedalboard.

There’s also the old-school traditionalists that swear by them. Some players believe that germanium or silicon transistor fuzz pedals only sound good with a dying battery, but that’s definitely one for the cork-sniffers! However, Voodoo Lab have fitted some of their PSUs with variable ‘SAG’ controls, which let you reduce the voltage to emulate this effect. Simply put, batteries are on their way out!

What Does Daniel Steinhardt Think About Powering Pedals?

Even though we’ve explained alternative power methods, power supplies are always king. Don’t believe us? Maybe this quote from pedalboard expert, GigRig founder and That Pedal Show host Daniel Steinhardt will make you a believer!

“Unless you get power right, your pedals will never sound as good as they can. Ensure that each pedal is receiving enough current and that the power supply you choose delivers clean, well isolated power to each pedal. No bloody daisy chains!” – Daniel Steinhardt

Pedalboard Expert Daniel Steinhardt

Cables – How Do I Connect My Pedals?

Don’t worry, we’re getting there! This is the last step before we explain how you put your pedalboard together. However, it’s just as important as the other things. The type of cables that you use to connect your pedals can also be the difference between good and bad tone, just like power or the effects themselves.

Firstly, pedals are connected with cables that are much shorter than those you would use to plug into your amplifier. I mean, those would still work, but you’d definitely want to use short cables. They’ll keep your signal strong and your board nice and neat! And when it comes to pedal cables, there are two camps – ‘patch cables’ and ‘cable kits’.

Patch Cables

Patch cables are basically super-shortened, jack-to-jack instrument cables. Typically U-shaped, patch cables let you place your pedals side-by-side and easily connect the output from one pedal straight into the input of the one beside it. With many modern patch cables featuring ultra-flat connector jacks, these allow you to place your pedals really close to one another, to save space.

With loads of companies making high-quality pedalboard patch cables, including Fender, Ernie Ball and EBS, Stagg also make really affordable products too. We’d always advise investing in the good quality ones, as not only will they keep noise low, but they’ll also last much longer.

Patch cables are popular as they are pre-assembled and ready to rock (excuse that terrible pun). However, as they are already made to a short and specific length, you’ll have to place your pedals in the order the you want them to go from guitar-to-amp, rather than place them in the most ergonomic fashion for your feet. With regards to pedalboard order, we’ll get to that soon!

If you’re keen to run a small and simple pedalboard, patch cables will make the most sense. However, if you have your heart set on a large and all-encompassing pedalboard, using cables that can be made to a determined length will make assembly much easier. That’s where cable kits come into play…

Featured Patch Cables

Shop Patch Cables

Pedalboard Cable Kits

Pedalboard cable kits are probably the best thing since sliced bread. Yeah, I said it. If you have borderline OCD like I do, then these kits will keep your board as tidy as… a neat thing. Available from the likes of BOSS, D’Addario, PedalPatch and Evidence Audio, these kits let you create your very own custom-length patch cables.

Coming with a generous length of continuous cable and several connectors, you may be thinking ‘I can’t solder, how can I make these?‘. Well, you’ll be pleased to learn that the majority of pedalboard cable kits are completely solderless. They don’t require any scary soldering irons to wire them together!

With some of these kits including cutters and even a screwdriver, brands like D’Addario and BOSS make sure that their kits come supplied with all that you need. The BOSS pedalboard cable kits also feature bi-directional connectors, letting you choose whether you want their orientation to be right-angled or straight. They’re pretty cool, just make sure that you have enough of them!

Featured Pedal Cable Kits

Shop Pedal Cable Kits

How Do I Put My Pedalboard Together?

Now that you’ve got your stompboxes, pedalboard, power supply and cables, let’s get to the really fun and practical part – putting together your pedalboard! This can be separated into a few key steps, which we’ve detailed below.

We’re going to assume that your pedalboard looks like a blank canvas right now, so let’s start with how to prepare your pedalboard properly. This is to make sure that your stompboxes are super easy to mount in a logical order.

Preparing Your Pedalboard – How To Apply Velcro

If you’ve bought a Pedaltrain pedalboard, you may have noticed that two rolls of velcro were included – the ‘hook’ and ‘loop’ sides. Some other brands also ensure that their boards come with velcro, so that you have one less thing to worry about buying before building your pedalboard.

Velcro has always been the most popular method, and it’s the one that we prefer. But before you start sticking the velcro down, wipe down the surface of the board with a suitable cleaning product. This is so that you remove any grease or dust that may be stuck to it. And while you’re at it, do the same to the underside of your pedals.

This is very important, as a clean surface will allow the adhesive from the velcro strips to stick as effectively as possible. If you don’t do this, whenever you feel an urge to change out some stompboxes or even rearrange your entire setup, the velcro may come off with your pedals! If there are any rubber feet underneath your pedals too, make sure that you remove them. This is so that your pedals sit flat on your board.

Now, we’d recommend applying the ‘loop’ (softer) side of the velcro to the pedalboard. There isn’t really a right or wrong here, but the ‘hook’ side is more abrasive and dust can easily get caught between the tiny spines. This means that if you ever want to clear the inevitable dust or debris that will collect on your board over time, the ‘loop’ side will be easier to hoover or brush.

When cutting the velcro, ensure that you have the velcro strips running all the way to edges of your pedalboard. This is so that you can maximize its real-estate, and have your pedals pushed all the way up to its perimeter if necessary.

The same thing applies to your pedals with the ‘hook’ side of velcro. Having a piece of velcro that runs the length of the underside of your pedals will ensure that they stick firmly to your board. But don’t velcro them down just yet…

In What Order Do You Place Pedals On A Pedalboard?

When it comes to setting up your effect signal chain, again, there’s no definitive right or wrong. Some players love to experiment with the order of their pedals, to harness unusual tones that you wouldn’t expect. However, if you want a versatile board that functions in a rational way, below we’ve created a guitar pedal setup diagram that shows you the order that many players adhere to:

Pedalboard Order Diagram

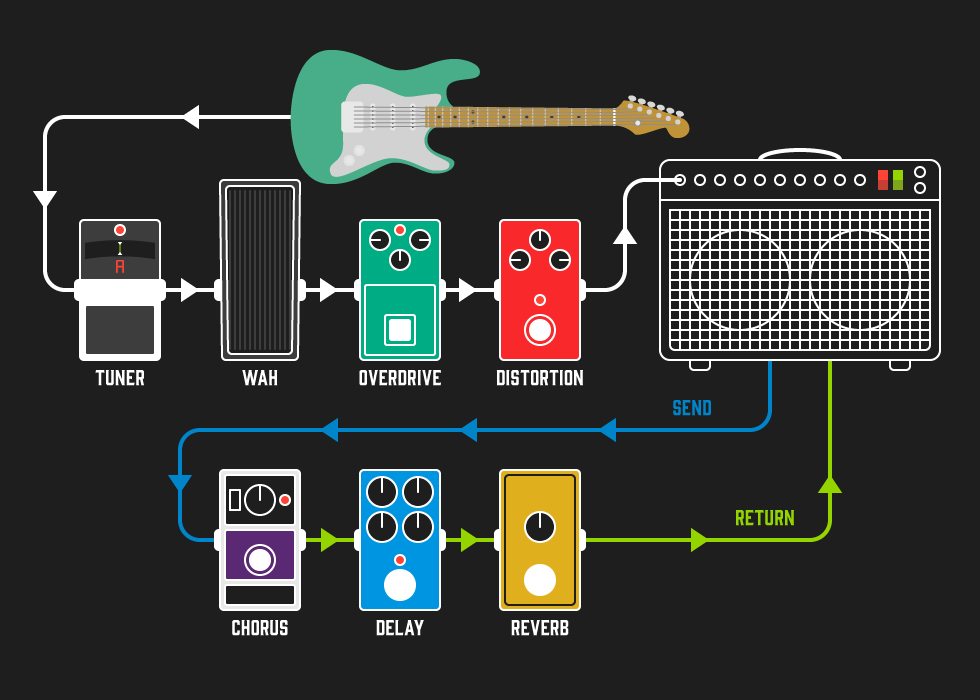
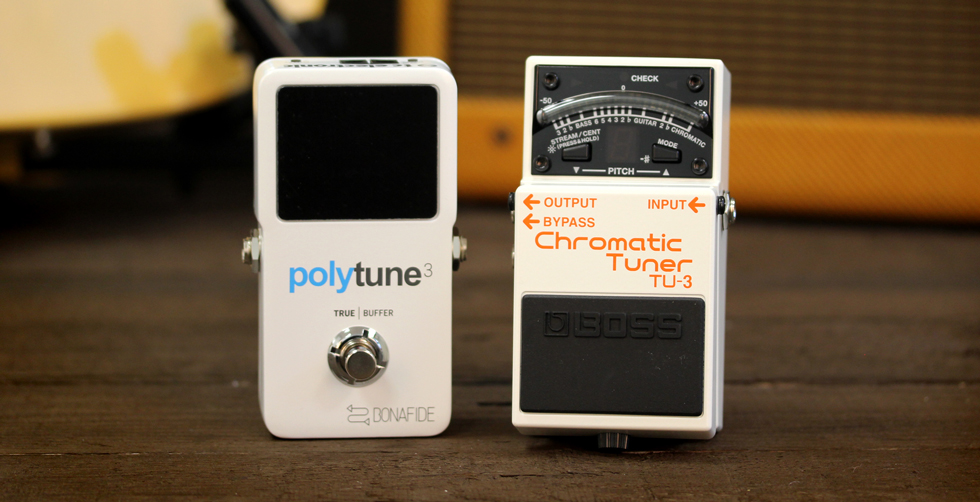
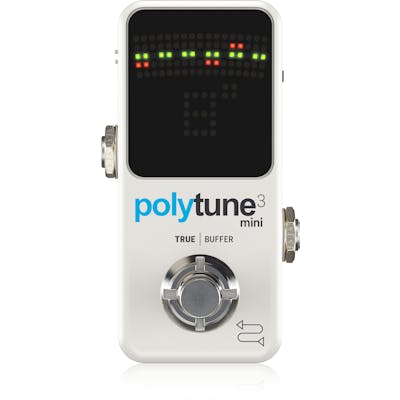
If you’re concerned about what the terms ‘send’ and ‘return’ mean, we’ll explain that in a bit. As you can see, the tuner is placed first in the pedalboard chain. The reason for this is that you would want the pure output from your guitar feeding into the tuner input. This will allow the pedal to identify the note(s) as accurately and quickly as possible.

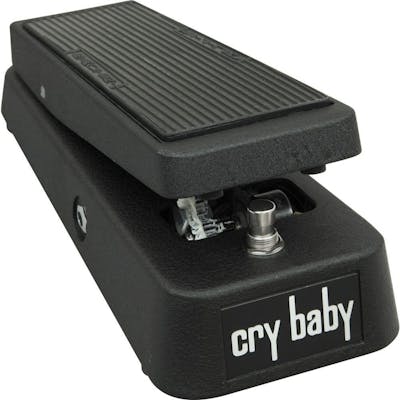
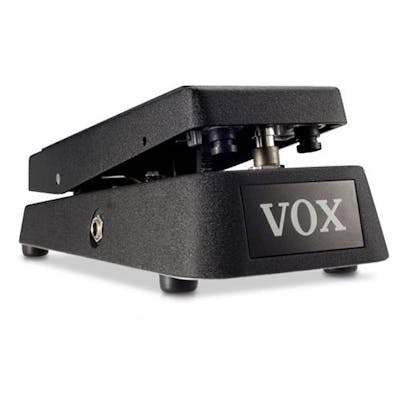
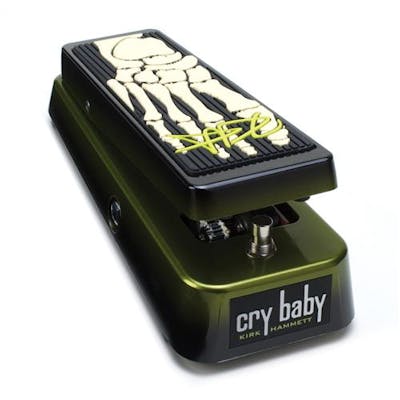
Wah is next, as the sweep is supposedly wider when it is placed before your overdrive or distortion stompboxes. This only applies if you’re intending to use them in conjunction with one another. But c’mon, a wah is meant to be used with some grit!

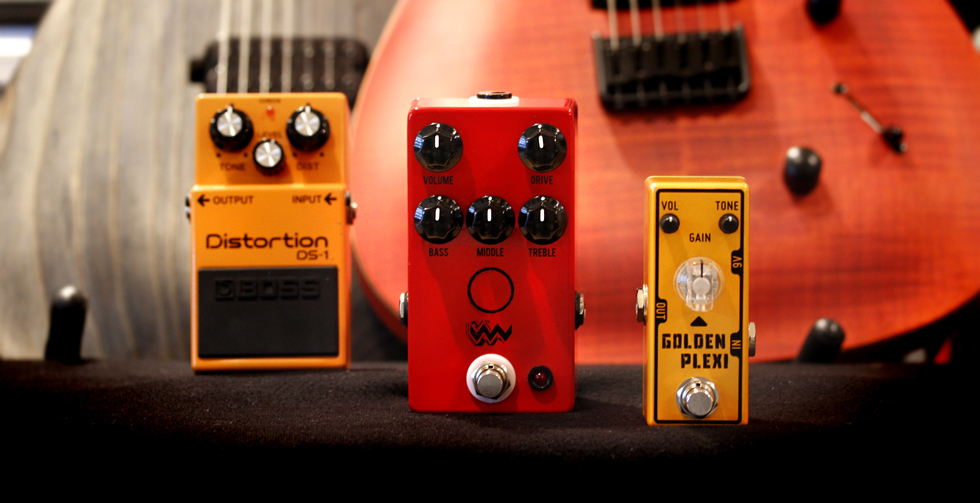
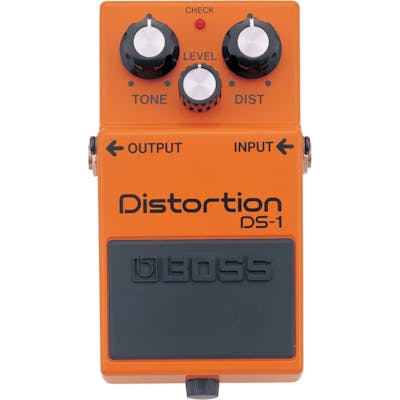
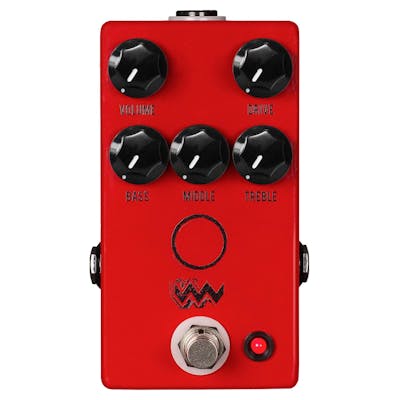
If you’ve done some research on guitar forums already, you may have noticed that the order of overdrive and distortion pedals is heavily debated. You’ll get different results depending on which comes first, and again, it depends only if you want to use them together. If you use an overdrive into a distortion, the overdrive will somewhat tighten its sound and give it more saturation. The other way around, and the overdrive will probably give you a volume boost.

How To Use Your Amp’s Effects Loop

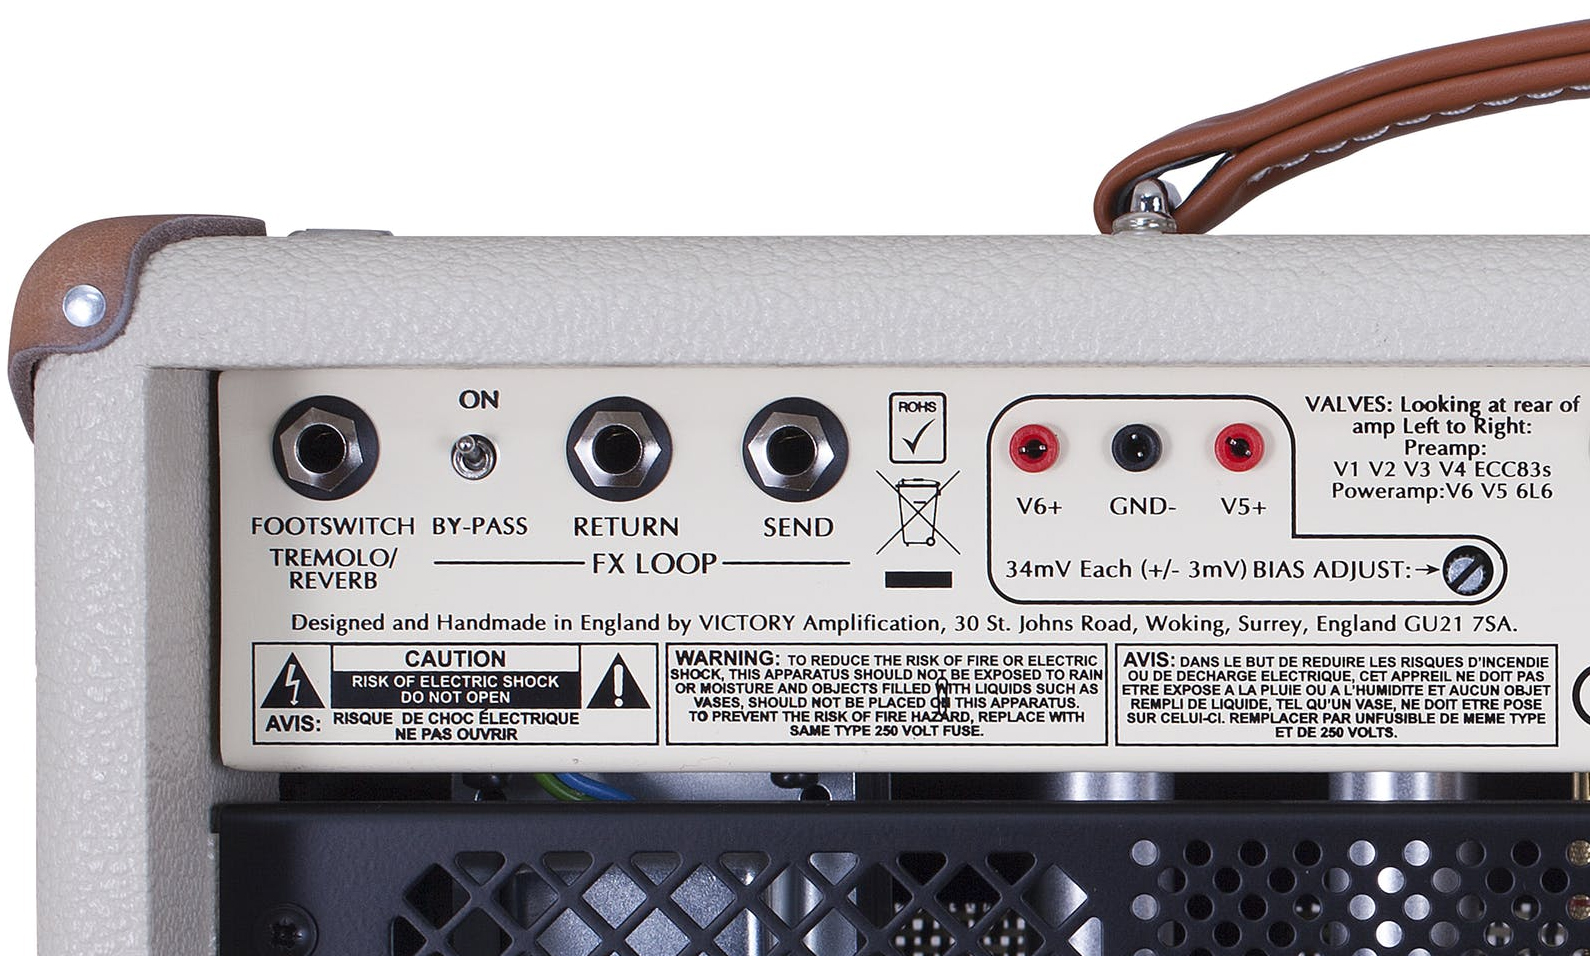
‘Send’ and ‘return’ refers to your amp’s effects loop. Don’t know what that is? That’s fine, just check the back of your amp and see if it has any inputs marked with those names. If the answer is no, then skip this section and organise your pedals in the same order as the diagram (from your distortion > chorus > delay > reverb > amp input).

If your amp does have an effects loop, then it’s best advised to run your modulation and time-based effects through it. This basically put your effects between your amplifier’s power and preamp sections. Without getting too technical, this lets the chorus, delay and reverb pedals sound more natural and less ‘in-your-face’.

All you’d need to do is run a cable from your amp’s ‘send’ to the input of your chorus pedal. Your chorus should be placed before your delay pedal, so that the delay repeats are of the modulated signal. This sounds much clearer than adding a modulation effect after a delay.

Your reverb pedal should always be last in your effects loop chain. This is so that it is adding ambience on top of everything before it, like a natural reverb effect would. The reverb pedal output should then be connected to your amp’s ‘return’ input.

Effects Loop on a Victory Amp

How Do I Arrange Pedals On My Pedalboard?

Pedal arrangement is something specific to you. If you’ve decided to buy patch cables, you won’t have much flexibility on the layout of your pedals. However, with a cable kit you can place your pedals wherever you like and still connect them together without difficulty.

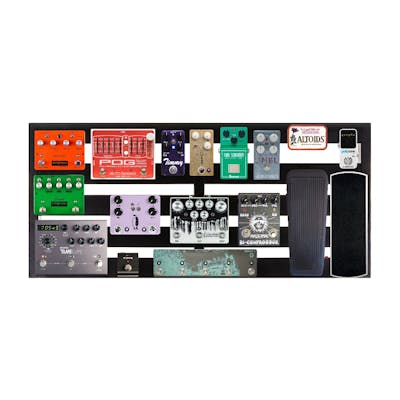
If you’re using a wah pedal, then you should mount it on the side of your pedalboard that you feel most comfortable using it with your foot. Simple! However, with the rest of your pedals, you should ask yourself about which ones you’re most likely to use. For example, your distortion and overdrive pedals are likely to get regularly stamped on. Therefore, it makes sense to place them at the front of your pedalboard.

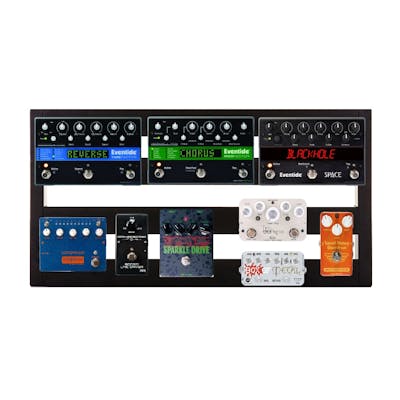
You’d also need to think about which pedals you’re likely to use with one another. We alluded to this in the signal chain order section, but if you always use delay when you’re playing a solo, it should be near enough to your overdrive and distortion pedals. This is so that you can quickly engage/disengage them together without tap-dancing all over the place! Before you firmly attach them to your pedalboard, just place your stompboxes loosely on the velcro, or draw out a diagram to remember their order.

Mounting Your Pedals and Connecting Them Together

Now that you’ve established the order of your signal chain and the positions of your pedals, it’s time to get them wired up! We think that it’s better to sort out the power before you start messing around with your patch cables. This is so that you can test that all of your pedals are working before you sort out the rest of the board.

How To Connect Your Pedal Power Cables

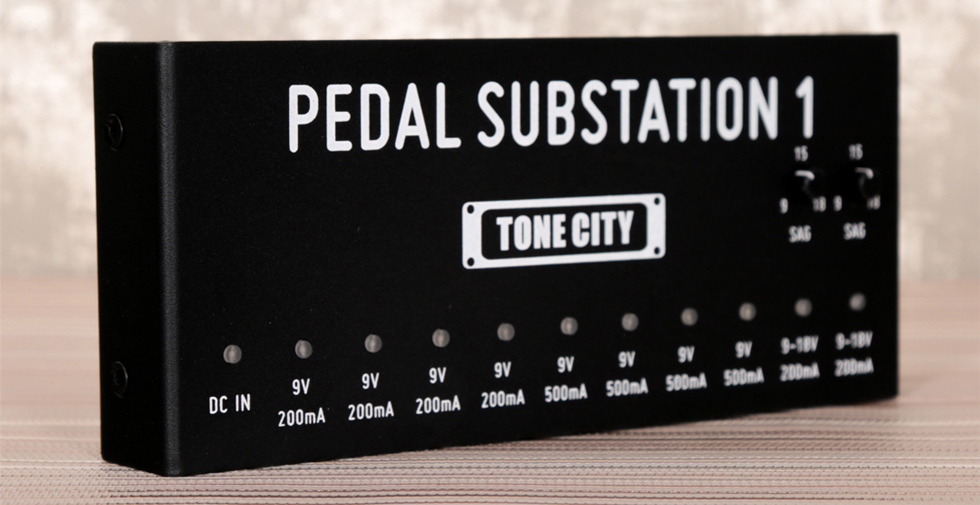
Like we recommended earlier, double check the voltages and current requirements of each of your pedals before making any connections. Make a note, and then decide which outputs on your power supply will work for each stompbox. Next, use the supplied cables to connect your pedals to your power supply. After that, plug into your mains to check that all pedals are working correctly.

Once you’re happy that they are functioning, unplug from the wall. At this point, you can use cable ties to group the loose pedal power cables together underneath your pedalboard. You can even tie them to the rails of your board for extra neatness! This will ensure that they are out of the way and not interfering with your patch cables, which brings us on nicely to the next section…

How To Connect Your Pedals With Patch Cables

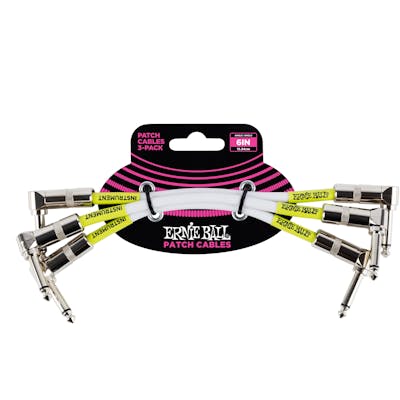
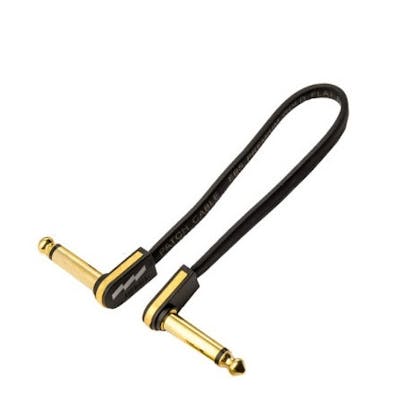
This is dependent on which cables you decided on going for. With regular pre-made patch cables, you’ll just need to feed the output of one pedal into the input of the next one in the signal chain. Of course, if you’re using patch cables, you would have made sure that your pedals were positioned in the order of your signal chain, so that the short patch cables can reach.

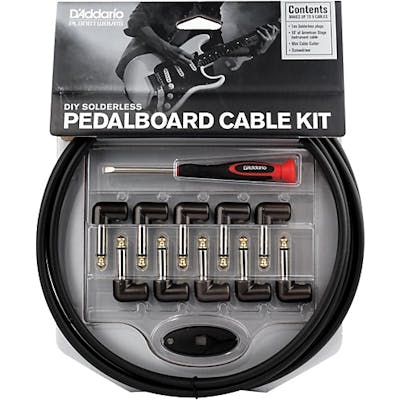
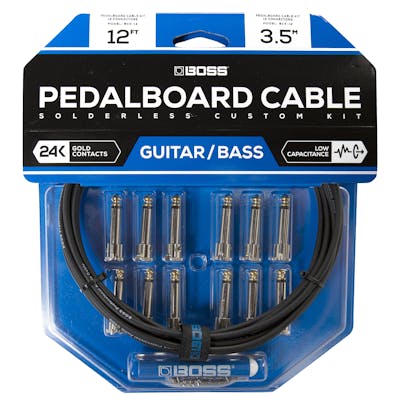
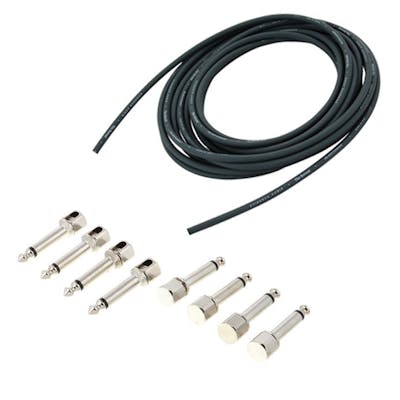
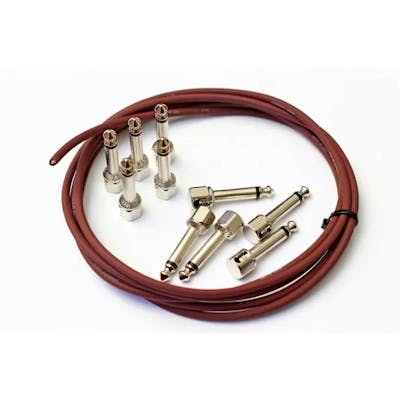
If you chose the pedalboard cable kit route, you can start making your own custom patch cables. Different kits have certain instructions when it comes to attaching the jack connectors to the cut cable. Just always do it carefully and as the manufacturer says. It’s common sense, but also make sure that you cut your cables as straight as possible. Remember to cut a bit more than the length you need, to prevent any cables from being too short.

Summary

We hope that our extensive guide to on how to set up your first pedalboard was helpful! You’ll now have a versatile selection of pedals to give you more sounds and creative freedom. New pedals are constantly being made and innovated, and the world of pedals is nearly endless.

But ensuring that you have a solid foundation for your stompboxes is more important than the pedals themselves. And with your new pedalboard, you’ve got one!

If you’re more of a visual learner, then this helpful video from Danish Pete and Joss will offer some valuable insight too! For all of our videos on Andertons TV, click here.

Want To Learn More?

Over on our main website, we’ve got tonnes of dedicated guitar pedal guides that will truly open your eyes to the world of effects! Check all of them out by clicking here. You can also view our entire pedal range, as well as our vast selection of pedalboards & accessories.

Interested in finding out more about music gear and expanding your knowledge? Click here to view all of our Learn articles!

Elliot Stent
Elliot Stent
Elliot is a Senior Digital Product Marketer at Andertons, and at least the 7th best guitarist in the company's Web Team. He's exactly one day younger than Harry Styles, and believes that this "head start" is the only reason why Harry's more successful than him.

Responses & Questions

Leave a Reply