How To Set Up Your First Pedalboard

Building a guitar pedalboard is an exciting and creative outlet for all players looking to expand on the instrument's basic sounds. Here's exactly how you get started.

Elliot Stent

Elliot Stent

Whether you’ve bought your first guitar pedal or two, or you’re completely new to guitar effects, I’ll guide you through the beginning process of buying and setting up your guitar pedalboard. Reverb, overdrive, delay, loopers and more: these are the stompboxes that expand your sonic palette. Assembling them on a pedalboard – essentially a bare metal frame – sets them out in a cohesive, methodical way, allowing you to activate them while you’re playing. It’s also the only way you’ll ever want to travel with guitar pedals, as it keeps them stuck to the board in a compact form and makes setup for performances and practice a hassle-free task.

There are a few steps you’ll need to take to make sure your pedalboard first and foremost works as intended, gets you the best sound quality and is future-proofed for expansion if you so desire. For this guide, I will keep it as simple as possible so you can jump straight into building.

How To Build A Pedalboard: Step-By-Step

Follow these steps to assemble your pedalboard:

  • Choose a versatile set of pedals – a tuner, overdrive, delay and reverb pedals are all core effects you’ll find on almost any pedalboard no matter a guitarist’s musical style.
  • Find the right sized board for what you want to achieve – it must have enough space to accommodate the effects you have now, the patch cables and power supply you’ll connect them with, and extra space for the pedals you’ll want to buy in the future.
  • Buy a pedal power supply – this keep your pedals powered safely wherever you go and eliminates issues with ground loops and AC line hum.
  • Order and connect your pedals – position your pedals in the signal chain in a way that you’re getting the most out of their qualities.
  • Mount your power supply and stompboxes to your pedalboard – After you’ve established your layout, apply velcro to your pedalboard/stompboxes and fix them in place.

How You Know When To Start Buying Guitar Pedals

Guitar amps are of course crucial to your sound, but often times they only come equipped with some basic effects. Reverb is relatively common, and if you’re lucky, you’ll get a tremolo/vibrato on a vintage Fender Tweed or Blackface style amp. The likes of the Boss Katana has several more effects. However, there’s a strong chance that if you’re reading this, you feel limited by what your current setup gives you in the creative department.

If you’ve sworn by plug-ins up until now, then you might want something physical that’s either not available or emulatable in software form, or you want something more controllable in a performance or live setting. Guitar pedals are designed to broaden your sonic horizons and there are plenty out there from the wave of overdrives to more niche effects like ring modulators. They’re easy to tweak as you can hear the changes in real time. Best of all, they’re great fun and your collection is unique to you.

The First Guitar Pedals You Should Buy For Your Pedalboard

While experimental boutique effects can be cool further down your pedal journey, pedalboards are built on the staple sounds. That’s why I’ve picked out some massively popular effects in the following list. You’ll see these pedals gracing the boards of anyone from pub giggers all the way to seasoned pros. Before we look at all of the key stompboxes you should have, you might ask “which guitar pedal should be my first?”

Well, that’s an easy one – a tuner pedal.

Tuner Pedal

A tuner is a necessity for pedalboard. They are superior in just about every way to a headstock tuner, in accuracy and ease of use anywhere dimly lit. The Boss TU-3 is the industry standard: not only accurate but practically indestructible. TC Electronic’s line of PolyTune pedals are also precise, and their PolyTune 3 units come in ultra-compact mini enclosures too.

Tuner Pedals for your Pedalboard

Featured Tuner Pedals

Shop Tuner Pedals

Reverb Pedal

A reverb pedal has the same effect on a guitar in the way a singer uses for reverb to ‘soften’ the sharper edges of their voice. It fills space like an echo, emulating the reverberating effect of sound in a room, like a hall for example. Reverb is used often in music production to add ambient trails, which is particularly great when used with little-to-medium amounts of gain on you amp or other pedals.

These pedals will often offer settings or variations like plate, spring, hall or shimmer reverb. TC Electronic’s Hall of Fame 2 offers all these sounds and more. Tone City’s Tiny Spring is fantastic in getting a pure spring reverb effect from one dial. Stereo reverb pedals are also available if you’d like to create an even all-encompassing sound.

Reverb Pedals on a Pedalboard

Featured Reverb Pedals

Shop Reverb Pedals

Overdrive Pedal

Even if you’re not a high-gain type of guitarist, a smattering of crunchy overdrive gives your tone a richness that enhances almost any situation. The amount of overdrive pedals out there will blow your mind, creating sounds that range from jazzy warmth to aggressive metal attack. However, there are some renowned models that have led the way for years, even decades.

Ibanez’s range of vibrant green Tube Screamer pedals are renowned for focused mid-range tones and can be used alone in a rock setting or to enhance a metal tone’s punch. The Boss BD-2 Blues Driver is also highly-regarded as a ‘transparent’ drive – meaning it only adds gain and does little else to colour your tone by altering EQ. If you’re looking for something more affordable, Tone City and Mooer make mini overdrive pedals that are great value-for-money.

Featured Overdrive Pedals

Shop Overdrive Pedals

Distortion Pedal

If you’ve already got an amp with a built-in distortion channel, then getting a dedicated pedal may not be necessary. However, if your amp only has a single channel or can’t churn out loads of gain, a distortion stompbox will raise some hell!

Usually coming with volume and gain controls, most distortion pedals will also feature a tone knob that gives you more treble and bite. You’ll find that many modern distortion pedals will also boast several EQ controls, much like the ones you’ll find on your amp. These offer more flexibility, letting you craft some tailored tones.

Distortion Pedals for your Pedalboard

Featured Distortion Pedals

Shop Distortion Pedals

Overdrive Pedal

There’s a thin line between distortion and overdrive when it comes to how they sound. Simply put, a distortion pedal will dish out lots of dirt while an overdrive delivers a low-gain crunch. Much like their distortion brethren, the amount of overdrive pedals out there will blow your mind. However, there are some renowned models that have led the way for years, even decades.

Ibanez’s range of vibrant green Tube Screamer pedals are always worth a shout, renowned for providing focused mid-range tones. The BOSS BD-2 Blues Driver is also highly-regarded, offering a smooth and creamy overdrive. However, if you’re looking for something more affordable, Tone City and Mooer make mini overdrive pedals that are great value-for-money.

Featured Overdrive Pedals

Shop Overdrive Pedals

Delay Pedal

A time-based effect like reverb, a delay pedal reproduces your guitar sound as subsequent repeats. While that description may not make it sound very appealing, as a creative tool, a delay pedal is pretty hard to beat.

For example, The Edge (U2) has relied on delay to create some of the most instantly recognisable guitar parts ever heard. Great for enhancing clean passages, a delay is also commonly used in conjunction with distortion and overdrive, particularly for enhancing lead solos.

TC Electronic’s delay equivalent of the Hall of Fame is the Flashback, which offers a versatile selection of delay types. The Boss DD-3T is also super-solid and easy to dial-in, producing crystal-clear and musical repeats.

Delay Pedals on a Pedalboard

Featured Delay Pedals

Shop Delay Pedals

Honourable Mentions

There are other popular effects you may wish to add to your pedalboard further down the line once you have your essentials. Some of these pedals could depend on the styles of music that you play or might have a unique effect or voicing you can’t find anywhere else.

A noise gate pedal is essential if you play hard rock or metal. For example, if you’ve chosen a potent-sounding distortion pedal with gain on tap, then a noise gate will tame any of the unwanted hissing in between notes. The Boss NS-2 is a particular favourite, as it lets you isolate noisy pedals with its own loop.

On the subject of high-gain beasts, fuzz pedals are popular with alternative rock and blues fans looking to create a ton of noise. Delivering on grainy character, fuzz is great fun for experimental players looking to push the sonic boundaries and power chord champs alike.

A chorus pedal is part of the modulation family of effects, along with phaser, flanger and tremolo. They are often grouped together because they work similarly, colouring your tone via signal processing. I would recommend a chorus pedal to begin with, lacing your tone in a sweet shimmer. Chorus can be heard all over the classic ’80s guitar sound. The MXR M234 Analog Chorus offers a rich and versatile sound, while the Tone City Angel Wing is great budget option.

Shop All Guitar Pedals

Mini Pedals

Mini pedals are an amazing choice for the guitarist concerned with space and weight. They take up roughly half that of a regular sized guitar pedal. Mini pedalboards – a small board fitted with several mini pedals and the odd standard-sized pedal – are often small enough to take on a plane as hand luggage. The only downside in most instances are the more limited controls of the mini pedals themselves. Any difference in sound quality between a regular pedal and the mini version is largely non-existent.

Pedalboard Bundles

In the interest of saving time and money, you could buy a pedalboard bundle which includes all the guitar pedals and the board itself to get started. Andertons have curated these bundles for the type of player you are – classic rock, blues, metal, indie, a huge Oasis, Van Halen or Jimi fan – you’ll find something you love here.

Choosing Your Pedalboard

Now that you have a collection of stompboxes, you’ll need to find the right pedalboard to accommodate them, and they come in a huge range of sizes. Real-estate should always be the first consideration. If you mostly play at home practising or recording, you might justify a larger board as you won’t need to move it around often. If you don’t fill the board right now you always have the chance to add to it, including the more unique effects that you can swap in and out.

For the gigging guitarist it’s worth considering portability because you’ll need a size and weight you can carry. A lot of live players actually opt for smaller-to-medium sized boards with more versatile effects. This is even more crucial if you use public transport or drive a small car, where a compact rig will be a lifesaver.

Shop All Pedalboards

Pedalboard Brands

Pedaltrain are the industry standard when it comes to pedalboards. Relied upon for years, their multi-rail designs allow you to easily mount your stompboxes, while letting you also tuck cables underneath for a neater look. Some of Pedaltrain’s larger pedalboards will also have a raised rear, making the pedals on the back rails easier to reach with your feet.

There isn’t that much variation with pedalboards as they are mostly just metal platforms. However, a Rockboard pedalboard has an alternative layout and construction. The one folded, cold-rolled aluminium sheet construction is light and flat. Featuring several cutouts as opposed to rails, Rockboard pedalboards benefit from a greater surface area.

Pedaltrain Sizes Diagram

Featured Pedaltrain Pedalboards

Power Supplies

The safest and most optimal way to supply electricity to your guitar pedals is through a fully-isolated power supply (abbreviated to PSU). They provide a steady and reliable current from any mains plug socket, split and isolated to each pedal. They also keep the noise of your guitar’s signal to a minimum and prevent any annoying humming noises.

Many brands make pedal power supplies, including MXR, Strymon, Voodoo Lab, Truetone and T-Rex. Available in different sizes, there are plenty of PSUs out there that will fit pedalboards of all dimensions and offer outputs for even the most expansive of setups.

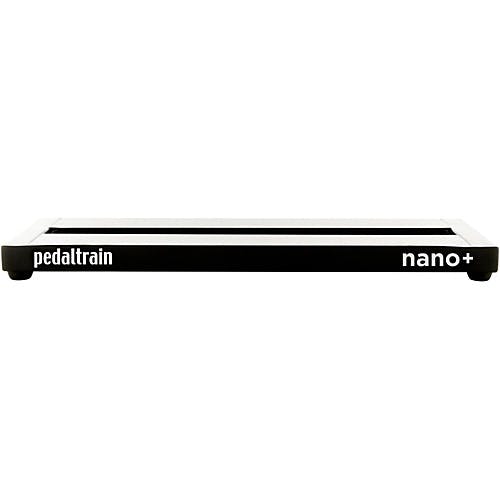
One of the best for small boards is the Walrus Audio Canvas Power 5, a five output PSU in an ultra low profile enclosure that will fit under Pedaltrain Nano and Metro boards. Suited to medium boards is the MXR ISO Brick Pro with nine outlets, two of which delivering a 500mA current suited to multi-fx and high-end digital pedals. It also has a link feature to add more MXR PSUs as you expand. A fantastic choice for a big board is the all-encompassing Fender Engine Room LVL 12 with twelve  outlets, two of which provide switchable voltage between 9v, 12v and 18v.

Voltage

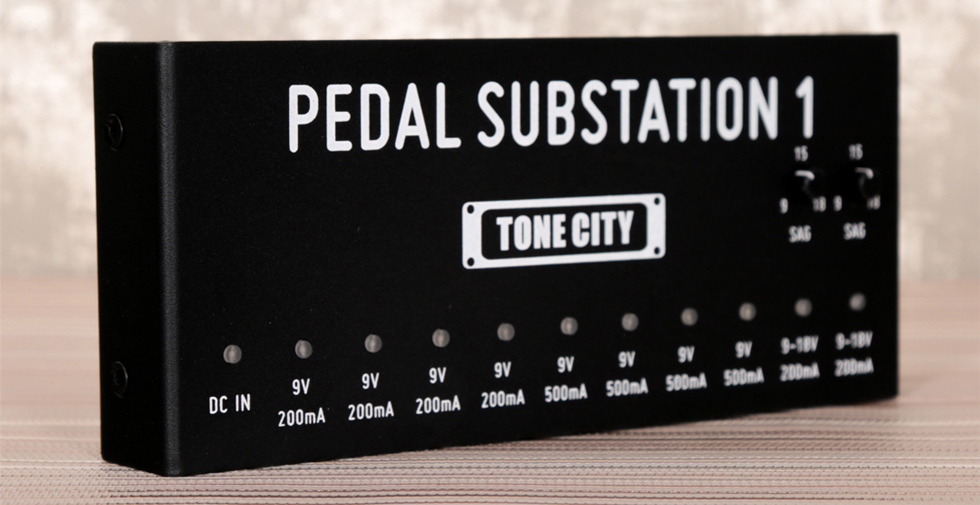
Different guitar pedals require different voltages to power them. Most will need 9v DC, some 12v and a select few need 18v (the DC standing for ‘direct current’). Some pedals may require ‘alternate current’ (AC) but in most cases those come with their own power supply. Check the technical specifications before you buy: using the wrong voltage can cause irreversible damage to a pedal. Plan ahead and ensure the power supply you pick features enough slots for the amount of pedals you have and enough of the necessary voltage outputs.

Current

Electric current is a flow of electrical charge. You will usually see this displayed as ‘100mA’ on your pedal, for example. With analogue stompboxes like overdrive or wah, the amount of current they require will usually be quite low. But much like with voltage, digital pedals will need a higher amount of current in order to function properly.

If a pedal doesn’t receive enough current then it simply won’t work, or its sound will be hindered. However, supplying a pedal with more current than it needs won’t affect its operation or sound at all. So if you give a pedal 300mA of current when its current draw is only 20mA, that’s totally fine!

Daisy Chaining

‘Daisy chaining’ is another method for powering your guitar pedals. Unlike an isolated PSU, you’re using a single power source to supply electricity to all of your pedals. This method is quite popular for beginner guitarists, as daisy chaining is significantly cheaper than buying a dedicated pedal power supply.

The TrueTone 1 Spot is perhaps the most well-known daisy chaining product out there. Featuring an 8-plug cable and a single power adapter that supplies 1700mA of current, you can quite easily power an entire board on a budget.

However, daisy chains have a few disadvantages. Firstly, you’ll have to ensure that all of your pedals are 9v. If not, you won’t be able to power them all as 12v or 18v pedals will need separate power supplies. You’re also more likely to encounter unwanted noise due to ground loops and draw imbalances when using both analogue and digital effects with different current needs.

In short, a daisy chain will cover your if you only have a handful of pedals of the same current and voltage requirements. Practising at home is the best setting for this, but it could likely be unreliable and lacking in quality when it’s most needed in a performance setting.

Power Supply Installation

Most guitarists with medium-to-large sized pedalboard opt to keep their power supplies mounted on the under-side of their board to allow more room for pedals and create a decluttered visual aesthetic. Before you start drilling any holes in your board, always follow the installation instructions on your PSU. A lot of pedalboards are raised higher from the ground towards the rear of the frame and include brackets to fit your PSU securely. You may find a low-profile PSU is great for this situation.

Affordable Pedal Power Supply

Featured Power Supplies

Shop Pedal Power Supplies

What Order Should You Place Your Guitar Pedals On A Pedalboard?

When it comes to setting up your effect signal chain, there’s no definitive right or wrong. Some players love to experiment with the order of their pedals to harness unusual tones. However, if you want a versatile board that functions in a logical way, below we’ve created a guitar pedal setup diagram that shows you the order that many players adhere to:

Pedalboard Order Diagram

Understanding Signal Flow

Your guitar captures the pure signal of what you play. It is then connected to each subsequent pedal in the chain. An FX style pedal at the beginning of the chain is going to impact the clean tone. A pedal at the end of the chain is going to react to everything that is active before it.

For example, a wah before all other effects is only going to apply its effect to that clean signal. It’ll sound defined as smooth. Placed after a distortion, the wah effect will be crackly, as it is applying its effect to the distorted signal.

The general order of pedals will look like:

Tuner > compressor and noise gate > wah and envelope filters > overdrive, distortion and fuzz > modulation, such as chorus, phaser, flanger and vibrato> time-based effects like delay, tremolo and reverb> looper > amp

The tuner should always be placed first in the pedalboard chain. You want the pure output from your guitar feeding into the tuner to allow the pedal to identify the note as accurately and quickly as possible. You’ll likely want a looper pedal at the end of your signal chain before the amp, so it captures loops with all the previous effects you had turned on. Volume and expression pedals can be placed at whichever point you would like to boost a part of the sound. If placed at the end, it’ll boost everything without altering tone.

How To Use Your Guitar Amp’s FX Loop

Lots of guitar amps will feature send and return input and outputs for 1/4 inch jacks. Check your amp to see if it has it: if it doesn’t, skip over this section and organise your pedals in the same order as the diagram above (distortion > chorus > delay > reverb > amp input).

The effects loop lets you position your guitar pedals in between the amp’s preamp and power amp. Without getting too technical, this is best for chorus, delay, tremolo, reverb and other time-based pedals. They’ll sound purer – more natural and less abrasive. Using a guitar cable, plug one end in the send output, the other into a chorus/tremolo to start it off and carry on the chain through to the end where reverbs often sit, because their effects can become very messy when they’re placed early in the signal flow. Plug a cable from the out of the reverb into the return on the amp.

Effects Loop on a Victory Amp

Connecting your pedals

Once you’ve decided on signal chain order, arrange roughly where they’ll be attached to your pedalboard. It’s best to keep the pedals you activate the most closer to the bottom of your board, so as to not bump the settings on any other pedals.

Patch Cables

It’s now time to connect all your pedals using patch cables. These are very short, U-shaped jack-to-jack instrument cables that let you place your pedals side-by-side. They function and look generally look the same as a longer jack cable but they also have flat connector jacks to save more space. Like any other element of a guitar pedalboard, patch cables vary in quality, so I would recommend Ernie Ball, Boss, Rockboard and EBS, to name a few. You can pick varying set sizes dependent on the distance between each pedal you need to conncet.

Featured Patch Cables

Pedalboard Cable Kits

If you’d like to be able to customise the exact length of your patch cables, then a cable kit is your best option. These are essentially the unassembled version of patch cables. You’ll receive one extra long cable and several jacks, which you’ll cut to the required lengths for your board. You’ll then have to screw the jacks onto the ends of the cable. It’s easy – brands like Boss make sure that their kits come supplied with all that you need. The Boss pedalboard cable kits also feature bi-directional connectors, letting you choose whether you want their orientation to be right-angled or straight. There’s no soldering or the like to be had either.

Featured Pedal Cable Kits

Shop Pedal Cable Kits

Assembling Your Pedalboard

If you’ve bought a Pedaltrain pedalboard, you’ll get two rolls of Velcro: one ‘hook’ side and one ‘loop’ side. Some other brands also pack their boards come with Velcro. Wipe down the pedalboard frame and under-sides of the guitar pedals. Cut and stick the softer ‘loop’ side of the Velcro to the pedalboard and ‘hook’ side to the pedals, making sure the Velcro covers as much of the surfaces as possible.

I like to plug some patch cables into place before sticking the pedals down so I know the maximum distance I can put between pedals. Once that’s done with all your pedals, connect the patch cables and the power cables from your pedals to the correct voltage slots on the PSU.

Plug your guitar cable into your guitar and the other end into the first pedal in the chain. You’ll need an extra 1/4 inch jack cable to plug the final pedal into the amp input. Two more cables will be required if you’re using the amp’s effects loop. Turn on the PSU and make sure everything turns on/off. If you have any issues with a dead chain, test each pedal individually to locate the issue.

Summary

A pedalboard will keep all your guitar pedals organised together for easy use, travel and quick setup. You can pick from an almost endless variety of pedals from the many pedal companies to build your board, including effects like overdrive, delay and reverb.

You’ll need a pedalboard suited to the amount of pedals you would like to include on your board. Keeping it small and versatile is great for gigging musicians with limited space or those on a smaller budget, but always keep expansion in mind.

You’ll need to power your pedals with a power supply, either available as a daisy chain or dedicated isolated PSU, the former being more affordable and the latter being the more optimal choice for pedal safety and sound quality. Make sure you check your pedal’s power requirements.

Plan out your pedal chain before sticking anything down on your pedalboard, adhering to the concept of signal flow in how each pedal will impact what comes after it. You’ll need at least two guitar cables to run a pedalboard and four if you use a guitar amp’s FX loop. Finally, assemble your board and get playing!

Want To Learn More?

Over on our main website, we’ve got tonnes of dedicated guitar pedal guides that will truly open your eyes to the world of effects! Check all of them out by clicking here. You can also view our entire pedal range, as well as our vast selection of pedalboards & accessories.

Interested in finding out more about music gear and expanding your knowledge? Click here to view all of our Learn articles!

Elliot Stent
Elliot Stent
Elliot is a Senior Digital Product Marketer at Andertons, and at least the 7th best guitarist in the company's Web Team. He's exactly one day younger than Harry Styles, and believes that this "head start" is the only reason why Harry's more successful than him.

Responses & Questions

Leave a Reply